Master the Violin Basics
Learning the violin combines coordination, rhythm, listening, and musical expression. Beginners can develop these skills by mastering fundamental techniques before progressing to more challenging pieces.
A structured approach helps build a strong foundation for accurate playing and greater musical confidence.
Understand the Violin
Familiarity with the instrument makes it easier to follow lessons and understand how different techniques produce sound.
Learn the main components
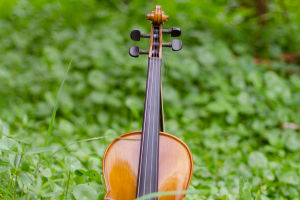
The violin features four strings, a fingerboard, a bridge, tuning pegs, and a chin rest. Its bow has hair that moves across the strings to produce sound through friction.
The tuning pegs adjust string tension, while the fingerboard provides the surface for changing pitches. The bridge supports the strings and transfers their vibrations to the instrument's body.
Identify the four strings
The strings are tuned from lowest to highest as G, D, A, and E. Practise playing each open string without pressing any fingers onto the fingerboard. Listen to the differences in pitch and learn to identify each string by sound.
Establish Correct Posture and Bow Hold
A comfortable playing position allows both hands to move freely and supports better control.
Position the violin
Rest the violin on your left shoulder, using the chin rest to help support it beneath your jaw. Keep your head balanced, your shoulders relaxed, and your left wrist in a natural position.
Your left hand should move freely along the neck without gripping the instrument tightly.
Hold the bow correctly
Hold the bow with your right hand, keeping your fingers naturally curved and your thumb comfortably bent. Maintain a secure but flexible grip that allows smooth movement.
Whether sitting or standing, keep your back naturally upright and your weight balanced. Position your music stand at a comfortable height so you can read the notes while maintaining a natural posture.
Develop Essential Bowing Skills
Bow control influences the violin's tone, volume, and musical expression. Begin with simple exercises to establish consistent sound production.
Practise open strings
Draw the bow across each open string using slow, even movements. Aim to keep the bow approximately parallel to the bridge and maintain consistent contact with the string.
Practise downward and upward strokes, listening for a clear, sustained tone. Work on one string at a time before combining several strings into a short sequence.
Control speed and pressure
Bow speed, pressure, and contact point influence the resulting sound. Start with gentle, controlled strokes and make small adjustments to explore changes in tone and volume.
Practise string crossings
Moving between strings requires coordination of the right arm and bow angle. Practise switching between neighboring strings slowly, keeping your movements relaxed. Gradually combine several strings into a continuous exercise.
Learn Finger Placement and Pitch
The left hand changes pitch by pressing the strings against the fingerboard. Accurate placement develops through repetition and careful listening.
Practise basic finger patterns
Begin with a simple exercise that introduces a few notes on one string. Keep your fingertips curved and your wrist relaxed, following a beginner fingering guide or teacher's demonstration.
Because the violin has no frets, small differences in finger placement can change the pitch. Play each note slowly and repeat the sequence until you can reproduce the pitches consistently.
Train your ear
Compare your notes with a reliable tuning reference or demonstration. You can also hum a short melody before playing it to connect the pitches you hear with the movements of your fingers.
Read Music and Play Simple Melodies
Basic music reading helps you understand pitches, rhythms, and the structure of a piece.
Learn musical notation
Start with the treble clef, the five lines of the musical staff, and the notes used in beginner exercises. Gradually learn common note values, rests, and time signatures.
Practise rhythm
Clap or count a short rhythm before playing it on the violin. Identify the beats and note durations, then combine the rhythm with the correct pitches.
Choose your first piece
Select a short beginner melody with a manageable rhythm and a limited range of notes. Divide it into small phrases and practise each phrase slowly.
Once the notes and rhythm become familiar, connect the phrases and gradually increase the tempo while maintaining accuracy.
Create an Effective Practice Routine
A focused routine helps you develop technique and measure your progress without making practice unnecessarily complicated.
Structure your session
A beginner session of approximately 15–20 minutes can include:
- Preparation: Check your posture and tune the violin.
- Bowing: Practise steady strokes on open strings.
- Finger exercises: Work on a few notes or a simple scale.
- Melody practice: Repeat a short musical passage.
- Review: Choose one skill to focus on next time.
Adjust the duration to your experience and concentration. Prioritize accuracy and control over speed.
Use guided instruction
A qualified violin teacher can help refine your posture, bow technique, finger placement, and intonation. Beginner tutorials and recordings can supplement lessons and provide examples of how musical passages should sound.
Build Confidence Through Practice
Learning the violin becomes more manageable when you progress from basic instrument knowledge to bow control, accurate finger placement, and simple music reading. Each skill prepares you for more advanced techniques and a wider range of musical pieces.
Practise consistently, listen carefully, and focus on accuracy before increasing speed. With a structured routine and patient attention to technique, you can develop greater coordination, produce a more controlled sound, and enjoy making music on the violin.

Contact to : xyjph123@gmail.com
Privacy Agreement
Copyright © boyuanhulian 2020 - 2022. All Right Reserved.
Privacy Agreement
Copyright © boyuanhulian 2020 - 2022. All Right Reserved.