Mastering the Ollie
If we are stepping into skateboarding, one of the most exciting skills we encounter early on is the Ollie.
It is a classic movement that helps us jump with the board, clear small stairs, gaps, and uneven ground.
Even though it feels challenging at first, it builds a strong foundation for everything else in skating. In this guide, we go through it in a clear and simple way so we can learn step by step with confidence.
Getting Ready: Body, Feet, and Balance
Before we start the movement, we focus on balance and comfort on the board. We keep our body aligned with the board, shoulders relaxed, and eyes slightly forward so we can still feel the board under control without looking down too much.
For foot placement, the front foot should rest between the middle of the board and the front mounting area. The back foot rests on the tail with a slight outward angle. This position helps us stay stable and ready for movement.
Weight control is also important. Most of the balance should remain over the front foot, which supports about seventy percent of the body weight. The back foot stays lighter, ready to give a quick and sharp action when needed.
Step One: Strong Tail Contact
We start by lowering the body slightly, bending the knees to build energy. The upper body stays relaxed so the movement stays smooth.
The back leg drives the motion through a quick, controlled force. Instead of using only the thigh, we focus on a fast transfer through the lower leg and ankle. This helps create a sharp and efficient motion.
The back foot presses the tail straight down, not sideways. This quick contact with the ground creates the first spark of lift for the board.
Step Two: Jumping Together
At the same time as the tail action, we jump upward. The key is not to lift only the feet, but to move the whole body upward as one unit.
The front leg begins to lift toward the upper body, while the back leg extends downward briefly before leaving the surface. This opposite motion helps create lift and balance.
Timing is important here. The jump and tail action happen almost together, forming one smooth motion rather than separate actions.
Step Three: Lifting and Guiding the Board
After leaving the ground, the front foot plays a big role. It pulls upward along the grip surface, guiding the board with control. The feeling is like sliding the foot upward while staying connected to the board.
The ankle naturally rotates slightly inward so the side of the foot maintains contact. This helps the board rise smoothly.
As the front leg lifts higher, it gently pushes forward toward the nose area of the board. The movement forms a wide arc, like drawing a soft curve in the air. This arc shape helps create height and smooth control.
Step Four: Shaping the Flight Path
During the airborne phase, we think about the board’s path. A good motion forms a rounded arc, not a sharp or short one.
The front foot controls direction while the back foot follows naturally. If the timing is right, the board rises evenly and stays balanced in the air.
We avoid rushing the movement. Smooth coordination helps the board stay level and stable.
Step Five: Landing with Control
As we come down, both feet guide the board back to a flat position. The goal is to land evenly with each foot near the mounting areas.
A soft landing helps protect balance and keeps the ride stable after touching down. We bend the knees slightly on impact to absorb movement and continue rolling forward smoothly.
Practice Tips for Faster Progress
To improve, we start with basic balance practice on the board while standing still or rolling slowly. This helps build comfort.
Repetitive tail pressing practice also helps. Doing small controlled presses builds familiarity with timing and force.
Some people find it useful to practice jumping without moving first, placing the board on soft ground to reduce pressure and focus on motion.
We can also practice rhythm by coordinating leg movement in a steady up-and-down pattern to train timing between both legs.
Style and Control Improvement
Once the basics feel stable, we can refine style. One helpful idea is to guide the front foot more forward during the lift phase, which creates a smoother shape in the air.
The back leg can be trained to tuck higher, helping the board look more controlled. Simple coordination drills, like light kicking motions, help build this feeling.
As confidence grows, these details naturally improve and make the movement look more fluid and expressive.
Keep Rolling with Confidence
Learning this skill is not about rushing. It is about building timing, balance, and smooth coordination step by step. When we stay patient and practice regularly, the movement starts to feel natural and even enjoyable.
So Lykkers, how does your first try feel on the board? Share your experience, and keep rolling forward with confidence.
-
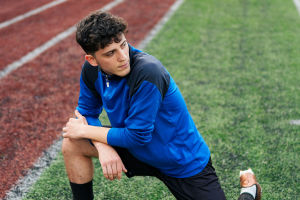 Stretch Before RunningDynamic Pre- and Post-Run Stretches to Keep Your Legs Flexible, Strong, and Comfortable
 -
 Fishing Made SimpleStart Fishing Stress-Free: 4 Essentials Every Beginner Needs to Save Money and Catch More
 -
 Dry Heat, Tough HikesWhy dry air drains energy fast—and how to stay safe, hydrated, and strong on trails
Contact to : xyjph123@gmail.com
Privacy Agreement
Copyright © boyuanhulian 2020 - 2022. All Right Reserved.
Privacy Agreement
Copyright © boyuanhulian 2020 - 2022. All Right Reserved.