Tempering Chocolate
Tempering chocolate is a fascinating skill that transforms ordinary melted chocolate into a glossy, crisp delight.
For all the Lykkers eager to learn, understanding this technique opens doors to crafting beautiful and delicious chocolate creations with professional quality.
This guide presents the essentials of chocolate tempering in a clear and approachable way, perfect for both beginners and those looking to refine their skills.
Understanding Chocolate Tempering
What Is Tempering?
Tempering involves carefully heating and cooling melted chocolate to stabilize the cocoa butter crystals inside. This process ensures the chocolate hardens with a smooth, shiny surface, a satisfying snap when broken, and melts perfectly on the tongue.
Proper tempering also prevents unsightly streaks or white spots on the chocolate, known as "bloom."
Why Temper Chocolate?
Tempering improves texture, appearance, and taste. Well-tempered chocolate melts evenly, releases full flavor, and maintains a firm structure at room temperature, making it ideal for candies, coatings, and decorations.
Key Requirements for Successful Tempering
High-Quality Chocolate
Using chocolate with a high cocoa butter content is essential. Avoid chocolates containing substitute fats, as they won't crystallize properly.
Essential Tools
A reliable kitchen thermometer, spatulas (steel and silicone), heatproof bowls, and a smooth work surface like marble or glass help control the process precisely.
Temperature Control
Maintaining exact temperatures during heating and cooling is crucial. Temperatures differ by chocolate type, generally around 50°C (122°F) for dark chocolate and slightly lower for milk or white chocolate.
Ideal Workspace
The environment should be draft-free, moderately cool (around 20°C/68°F), and dry, as humidity can negatively affect tempering.
Clean Equipment
Even a drop of water can cause chocolate to seize into a grainy mess. Ensure all utensils and surfaces are dry and spotless.
Patience and Practice
Tempering is an art that improves with experience. The right technique takes time to master, so persistence is key.
Methods to Temper Chocolate
Traditional Double Boiler (Bain-Marie) Method
Chocolate is gently melted over warm water kept below boiling. First, heat to around 50°C, then cool to approximately 27-28°C while stirring. Finally, rewarm slightly to 31-32°C to promote the desired crystal structure. This method offers fine control and is preferred by many chocolatiers.
Microwave Technique
Ideal for smaller batches, the microwave method requires heating chocolate in short bursts at low power, stirring thoroughly between intervals. Temperature checks guide the process to prevent overheating. Adding small amounts of cooled chocolate to melted chocolate helps achieve the correct crystallization temperature.
Using a Tempering Machine
Automated tempering devices control temperature and stirring precisely, making them perfect for large quantities or professional use. These machines keep chocolate at the ideal temperature once tempered, ensuring consistency and ease of use.
The Science Behind Tempering: Crystal Formation
Cocoa Butter Crystals
Cocoa butter forms six types of crystals, each with different melting points and stability. Tempering encourages formation of the Type V crystals, which create smooth, shiny chocolate that melts at body temperature.
Heating and Cooling Stages
The process starts by melting all crystals, then cooling to encourage Types IV and V to form, and a gentle reheating to eliminate less stable crystals (Types I-IV). Proper timing and temperature management are essential to get only the desired Type V crystals.
Benefits of Proper Crystallization
Texture and Snap
Tempered chocolate breaks with a crisp snap, reflecting a firm yet delicate structure.
Appearance
It maintains a glossy, smooth surface free from blotches or dullness.
Stability
Tempered chocolate withstands room temperature without melting too quickly or becoming sticky.
Risks of Improper Tempering
Dull Surface and Bloom
Incorrectly tempered chocolate often appears matte and may develop white streaks caused by fats or sugar rising to the surface.
Grainy Texture
Chocolate that hasn't been tempered properly can feel rough or sandy when tasted.
Poor Setting
Such chocolate may stay soft or sticky instead of solidifying, complicating molding and decoration.
Lack of Snap
A flexible, bendy texture replaces the satisfying crisp break of quality chocolate.
Tools to Support Tempering Success
Work Surface
A smooth, cool surface such as marble, glass, or ceramic helps spread and cool chocolate evenly.
Spatulas
Steel scrapers and silicone spatulas aid in mixing and smoothing chocolate during temperature changes.
Thermometers
Digital, infrared, or probe thermometers ensure precise temperature readings.
Additional Supplies
Heatproof bowls, pots for bain-marie, and kitchen gloves provide safety and convenience.
Final Thoughts
Mastering chocolate tempering is a rewarding journey for all Lykkers passionate about creating delectable chocolate treats. This technique guarantees chocolate with flawless shine, perfect texture, and exceptional flavor that elevates homemade and professional confections alike. Armed with quality chocolate, the right tools, and a patient approach, anyone can bring this chocolate art to life and impress with every bite.
The key lies in precision, practice, and enjoying the sweet process of transformation. Embark on this sweet adventure and discover the joy of perfectly tempered chocolate in all your creations!
-
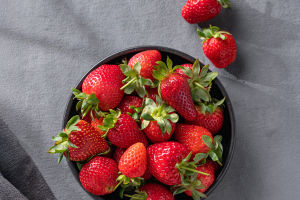 Cool Refreshing FruitsSummer's Best Hydrating Fruits to Keep You Cool and Energized!
 -
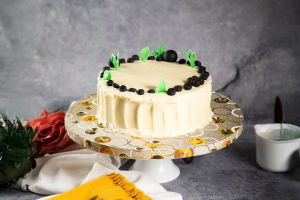 Blueberry White DelightThis Blueberry White Cake Is So Soft and Dreamy—You'll Want to Make It Again and Again!
 -
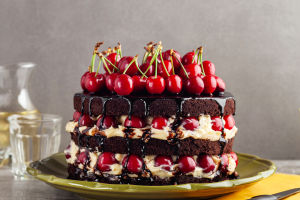 Cherry Cake JoyThis Cherry Cake Is So Soft and Easy to Make — You'll Never Want Store-Bought Cakes Again!
Contact to : xyjph123@gmail.com
Privacy Agreement
Copyright © boyuanhulian 2020 - 2022. All Right Reserved.
Privacy Agreement
Copyright © boyuanhulian 2020 - 2022. All Right Reserved.